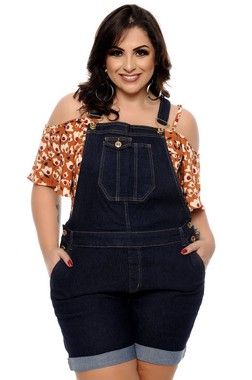
So, today I’m going to quickly show you the Rad So Over-It-Alls that I made, but then I want to talk about some inspiration and get into ways you can change or hack the pattern to give you even more. You’ll be able to find all of these on my So Over-it-Alls Pinterest board, linked at the end. For my make, I chose shorts and made them out of a liverpool, but my first test pair I made from a solid coral ponte. The original way of attaching the straps was a lot harder and I wish I had done a better job because while I’m not usually a bright pink kinda person, they were sooooo cute. I love a more structured fabric, and those are great for the overalls plus you can use a woven with stretch.

The pattern includes instructions for overall buckles but there’s so many options. You can get those buckles at Joanns, Walmart or on Etsy here and the nice thing is that the button is no sew! It’s a stud that you hammer in, but be careful because it can go crooked easily. Another option is to do buttons and buttonholes, and honestly you could do the holes on either the straps or the bib, depending on how you want it to look and attach. Another option that I saw at Target last week is to use a swivel hook and grommets. I found larger black and white grommets at Joann’s and I fell in love with these metallic rainbow hooks on Etsy.

If you’re using a less stable fabric that has good drape, think about doing shoulder ties instead of buckles or buttons! Cut another set of the straps and insert it into the front bib the same way as the back. Try your overalls on to decide on the best strap lengths and then hem all the raw ends. Tie them over your shoulders and go!

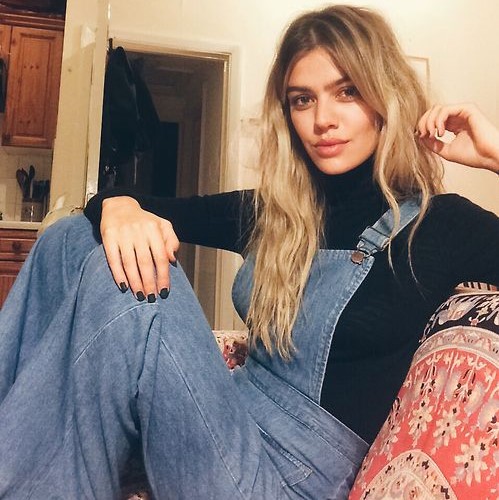
Copying this look is so simple! First of all, just don’t cut out the back bib! You’ll need to lengthen the straps, and this will be a little trial and error: it’s better to cut them too long and cut them down to size later. You won’t need to cut them with an angled edge, but if you’re going to cross them in the back you can. It won’t be the same angle, but you can line the strap pieces up along the waistband piece to test out angles. Insert the straps the same way you would the back bib into the waistband.
Add belt buckles, especially if you’re using denim or a stretch twill! There’s two ways you could make belt loops. Either way, you will cut a long length of fabric, figure out this by measuring the height of your waistband piece and multiplying by the number of belt loops you want. I would cut some extra length to allow for some ease/space if you want to actually use a belt but also for mistakes. From there, you can either fold it RST stitch up the long side and turn like a tube, or you can fold the strip in thirds and topstitch along both long ends. From there, you can cut into as many loops as you want, and sandwich into place as you attach the waistband.
What about changing the shape of the front bib? Aside from a different visual effect, this can also change the front coverage. If you square off the top corners and cut the pattern piece straight down, you can have a boxier front bib. This will open up the sides for less coverage, which can show off the under layers more. You can also add some more coverage by making the bib the same shape but wider, just by cutting further away from the fold. Or, you can change the shape a little, adding a point that brings the sides further over the bust and then further around the side of your waist.
Another simple thing to add is pockets! We all know the overalls of our childhood had that pocket on the front bib, and it’s such a classic look. What I like to do is sketch out the pocket shape that I want right on the pattern piece. It helps to not only figure out placement, but decide what finished size works. Then you can grab another piece of picture and trace that pocket, adding seam allowances. Cut your pocket out, fold the top over and stitch, then topstitch the pocket in place. There are lots of different pocket shapes to choose from, and you can add extra stitching or zippers to make it even more personal.

The So Over-It-Alls are drafted with a tighter fit pant, but you can easily widen the leg for a completely different look. On both legs, extend the hem out on either side, and then straighten out the curve. Start at the outer hip line and the inner crotch curve and go straight down to the hem. The hips are still going to be fitted because that is how they are drafted, but from mid thigh down will be a lot looser. Another option is to flare the bottom of the pants out. If you have the Solar Flares, you could follow the bottom curve of those, or gently curve from the knee out as far as you’d like. Extend them the same amount, but remember that the back leg should be wider.

My final inspiration change is to add a front button placket, but we’re also going to get rid of the facing. Cut your bib piece in half down the center front. Tape the piece onto another paper so that we can add the placket on, and add another 1’2″ to the top and outer sides. Extend the top and bottom lines straight out. Your placket needs a few inches added, starting with an inch where the two sides will overlap. Then we need another 2 inches to fold over and create the placket itself. (So this is a total of three inches) Cut two pieces of interfacing 1″ wide by the length of the bib and apply to the inner edge of the front bib to add stability. Fold 1″ and press, then fold another inch and press. Stitch at 1/8″ and 7/8″ to close the placket, then repeat for the opposite piece. Fold and press the top and sides 1/2″ twice and stitch in place, for both pieces. Add buttonholes and buttons, and pin on placket directly on top of the other. You can now add the bib into the waistband as per the directions!
Don’t forget about the discount code and giveaway from Rad, plus there’s still a FabricMart giveaway open!

LINKS
Rad Giveaway | Rad Website | Pattern
All Romper Month Posts | Sweeps Page
Pinterest Inspiration Board


I think my favorite hack is adding pockets!! Especially with denim, I think overalls look super cute with pockets 🙂
LikeLike
I agree! I think a denim pair might look a little unfinished without a pocket.
LikeLike
I love how fun this fabric make these overalls!
LikeLike
Thank you! I’ve had it for a while waiting for the “perfect” pattern and I think this is it!
LikeLike